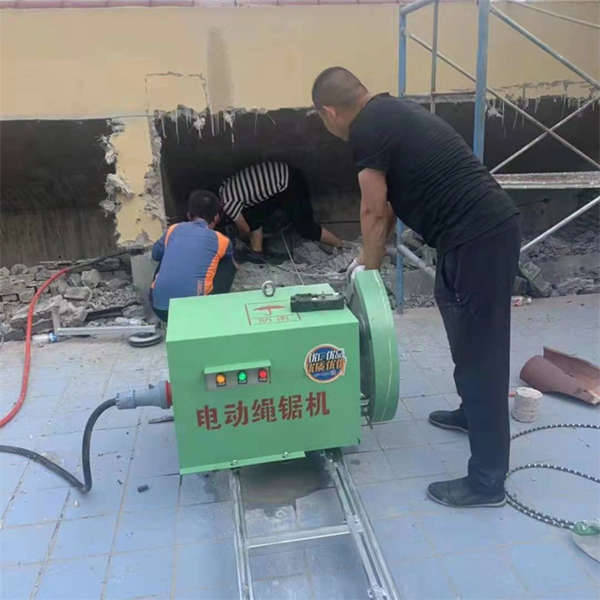
Introduction to Homemade Diamond Wire Saws
Crafting your own diamond wire saw can be both a rewarding and cost-effective venture for DIY enthusiasts and professionals alike. These tools, primarily used for cutting through hard materials such as concrete, stone, and even some metals, offer precision and efficiency that traditional saws cannot match. In this article, we’ll explore how to create a homemade diamond wire saw, focusing on key components, assembly instructions, and safety considerations.
Selecting Materials for Your Diamond Wire Saw
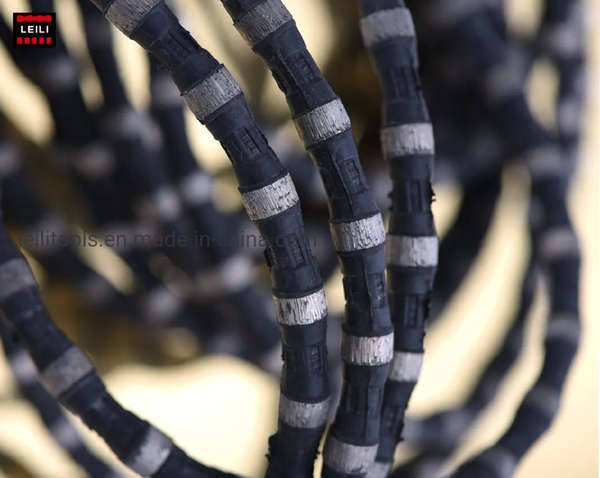
Before embarking on building a diamond wire saw, it’s crucial to select appropriate materials. The primary component is the wire itself, which needs to be embedded with diamond particles to ensure effective cutting capabilities. Stainless steel or high-carbon steel wires are commonly used due to their strength and durability. Additionally, you will need spools, pulleys, and a tensioning mechanism to complete the setup. Each part plays a critical role in the performance of your diamond wire saw.
Assembling Your Homemade Diamond Wire Saw
Once all necessary parts are gathered, assembling your diamond wire saw involves several steps. Start by attaching the wire to one of the spools, ensuring it’s securely fastened. Next, thread the wire through the pulleys, maintaining a straight path to prevent kinking or damage. Finally, connect the other end of the wire to the second spool, applying sufficient tension to keep the wire taut during operation. Proper assembly is essential for maximizing the lifespan and effectiveness of your diamond wire saw.
Customizing Your Diamond Wire Saw for Specific Applications
The beauty of building a homemade diamond wire saw lies in its customization potential. Depending on the material being cut, adjustments can be made to the wire’s diameter, diamond grit size, and overall length. For instance, thicker wires with larger diamond segments are better suited for cutting harder materials like granite, whereas thinner wires might suffice for softer stones. Experimenting with these variables allows users to tailor their diamond wire saw to specific projects, enhancing productivity and reducing wear on the tool.
Maintaining and Troubleshooting Your Diamond Wire Saw
Like any piece of machinery, regular maintenance is vital for keeping your diamond wire saw in top condition. This includes inspecting the wire for signs of wear or damage before each use, lubricating moving parts to reduce friction, and cleaning debris from the saw after every project. Should issues arise, troubleshooting common problems such as loose wires or malfunctioning pulleys can often be addressed with simple adjustments or replacements. Keeping your diamond wire saw well-maintained not only extends its life but also ensures consistent performance.
Safety Precautions When Using a Diamond Wire Saw
Safety should always come first when operating power tools, including diamond wire saws. Protective gear such as goggles, gloves, and hearing protection should be worn at all times to safeguard against flying debris and noise. Additionally, ensure that the area around the workpiece is clear of obstacles and bystanders before starting the cutting process. Understanding and adhering to safety protocols is paramount in preventing accidents while using your diamond wire saw.
Conclusion: The Future of Homemade Diamond Wire Saws
As technology advances and DIY culture continues to grow, the possibilities for creating innovative tools like homemade diamond wire saws expand exponentially. By following these guidelines, enthusiasts can construct efficient, reliable devices capable of tackling challenging cutting tasks. Whether for personal projects or professional applications, mastering the art of building and using a diamond wire saw opens up new avenues for creativity and problem-solving within the realm of material processing.
报错: 未找到这个表单

Automatic Continuous Edging Machine Th...

Bridge Stone Saw Scope of applicat...

Concrete Cutting Machine Concrete ...

Diamond Rope Saw Description: The f...
